Allow me to let you in on a little secret — the easiest way to stop losing tools is to organize your tool chest once and for all. Simple, right? Well, that’s easier said than done. Organizing a tool chest isn’t as simple as it looks, and I’m talking about more than just placing your tools so they look good in there. A lot more planning goes into deciding where to place each tool, and good aesthetics is merely a by-product of the process. After all, if you work on cars day in, day out, convenience is what you should be aiming for here.
Not every mechanic will agree, but I genuinely believe tool chest organization is an art, and in most cases, an ongoing one. In this article, I will tell you exactly how to organize your tool chest, or at least how I do it, right down to the intricate details so that you won’t ever have to spend more than a few seconds to find the tool you need. My method may seem arduous and time-consuming, but follow the given steps, and I guarantee you will be set for years to come.
Of course, I don’t intend to claim that I have the “ultimate” solution in any way. Every mechanic is different, and what is art for you may not be to others. As a result, take this piece more like a collection of tips and tricks I’ve learned over the years, looking at what coworkers were doing, keeping what I liked, and discarding what I didn’t. You should do the same here — take what works for you and adjust it to better fit your own preferences (and if you do, don’t hesitate to share your own tips below!)
But I digress… So without further ado, let’s dive in!
Make an Inventory
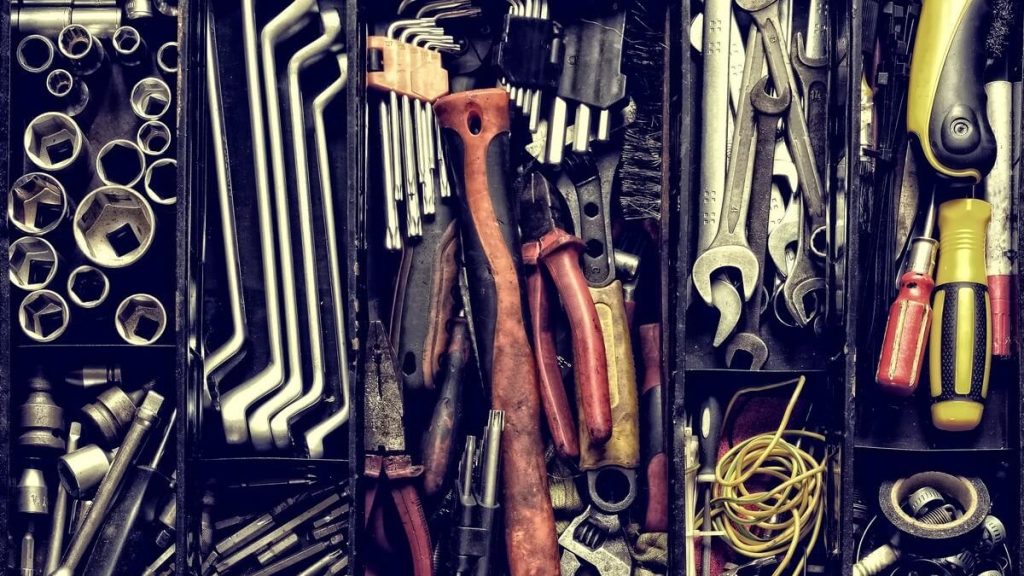
When organizing your tool chest, the first thing you want to do is to empty it completely. Start by thoroughly inventorying everything, down to the last wrench and socket. The aim here is to get to know what you are dealing with. You should also use this opportunity to inspect your tools, clean them, grease what needs to be greased, and discard old/broken/unused tools — you don’t need that in there.
Once that’s done, it’s time to estimate the usable storage space you have in your garage. Check your tool chest, cabinets, shelves, or any other storage area you might use. Then find a nice open space (the garage floor might be your best bet if you have a lot of tools, which is most probably your case if you landed on this post lol) and lay all your tools out neatly.
Categorize Your Tools in Several Groups
Once you’ve laid out every tool you own, it is time to divide them into small groups. Now, there are several ways to do that depending on your personal preference and the type of work you most frequently do. For example, tools can be split based on type, sizes, frequency of use, and much more.
However, if you ask me, the best course of action here is to keep it simple and merely put the wrenches in one corner, screwdrivers in another, and so on. Make sure you adequately separate different groups not to cause any confusion later on. For instance, I would suggest splitting ratchet wrenches and regular ones, same for standard sizes and metrics, and so on.
Organize Your Tools by Size and Frequency of Use
Next, you want to start with any group — say we start with all the wrenches; lay them all out by size in ascending order to mimic how they will sit in the tool chest’s drawers. Repeat the same process with screwdrivers, drill bits, power tools, and any other groups you may have created in the previous step.
Keep in mind that you’ll also want to manage the available drawer space efficiently — it’s no rocket science, but requires a bit of planning. For instance, one drawer can accommodate two wrench sets starting from opposite sides, with the largest ones positioned towards the edges.
While sorting tools based on size, you also want to consider how much you plan on using them. For example, technicians working in body shops will use grinders, sanders, or polishers more often, while tire-shop mechanics will live and sleep with their impact wrenches. In this case, I would suggest keeping your impact sockets on top of your chest, in a magnetic socket organizer for instance.
This exercise aims to sort through the clutter and determine which tools you use the most and the least, so we can allot prime spaces to the former for easy and quick access.
Put the Tools You Don’t Use in a Cabinet
Regardless of the experience level, every mechanic will have some tools that barely ever see the light of day. Depending on your daily activities, this tool(s) can be anything from a digital torque wrench to an OB2 scan tool. Besides, if you are like me, you have probably bought multiple several ratchets, hammers, screwdrivers and now you mostly use only the one you prefer.
In this case, store the tools you don’t use very often in a garage cabinet, so they don’t get in your way and take half the space available in your chest — you can always walk 4 steps more steps to go get your extra-long ratchet with that super slim flex head for the rare times you actually need to remove a water pump pulley and only keep the ratchet you use every day in your chest.
Read more: Best Garage Cabinets for All Your Tools and Equipment
Of course, it’s also important not to overdo this step and dump everything in a cabinet just because you don’t use it regularly. Cabinets are only meant for duplicates or tools you use once a year (or for the bigger stuff). For instance, I tend to lose 10 mm sockets a lot (you probably do too, right?). As a result, I now buy them in batches of ten, keep one in the tool chest, and the rest go into the cabinet until I inevitably lose this one.
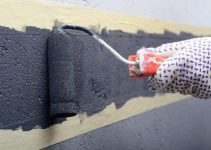
Clean Your Tool Chest Thoroughly
You won’t often have an empty tool chest so think about giving it a thorough clean before putting everything back in. First, strip down the tool chest of any foam linings and any other attachments you may have added over time. Tool chests tend to accumulate a lot of grease and dust, so use industrial-grade wipes to get rid of the build-up.
If you’re like me and haven’t got a chance to clean your chest in years, use a clean cloth soaked in paint thinner to remove tough stains easily (brake cleaner also works decently fine). For the exterior, use a cloth soaked in soapy water or any other household cleaner you might have.
After you are done cleaning, let your chest dry out. It may look dry from the outside, but water or liquid in the drawers may take a while to evaporate. Leave all the drawers open for a couple of hours, or use a clean, dry cloth to speed up the process. While you are at it, don’t forget to lubricate the bearings, slides, and any other moving parts — you’ll thank me later.
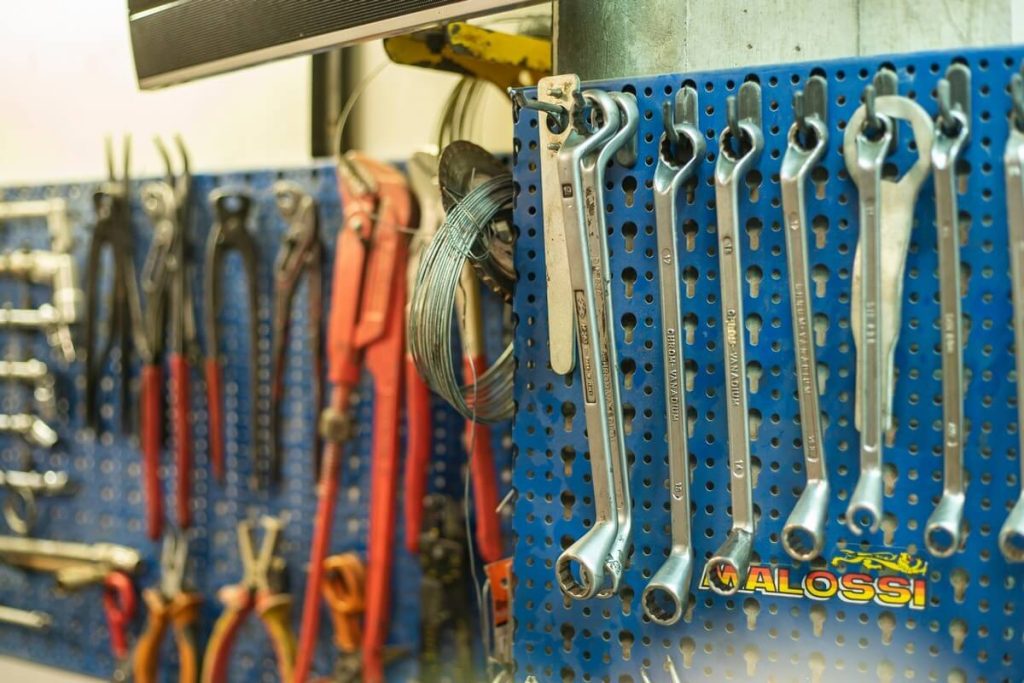
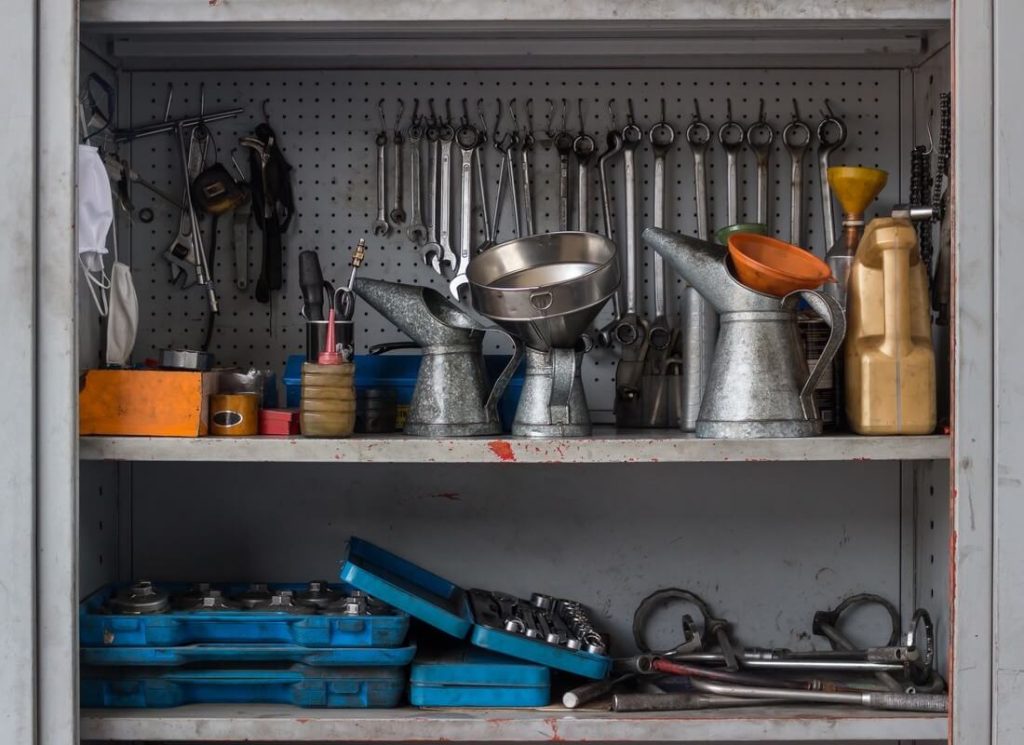
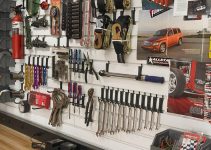
Use a Pegboard for the Most Frequently Used Tools
Some tool chests come with an integrated pegboard you can use to hang the most frequently used tools. They aren’t that expensive, so if your chest doesn’t have one, you can buy a separate pegboard for a reasonable price and hang it on a wall nearby. I personally like to use my pegboard to store the bigger stuff like hammers, big pliers, pipe wrenches, oil wrenches, and such, which tend to take a lot of space in a drawer.
Read more: 5 Best Pegboards to Tidy Up Your Garage Tools and Equipment
Of course, this type of setup doesn’t really work for mobile mechanics, but you can always install one in your truck and simply pick the ones you need for the task at hand and put them in your portable toolbox (of course, you’ll need to make sure your tools are properly attached before going for a drive or you’ll have quite a mess to pick up when reaching your next client).
Also worth mentioning, while pegboards can be extremely convenient to hang tools, you can always use them to hold little plastic containers to store nuts or bolts, allowing you to reclaim that drawer full of spare bolts, springs, fuses, and such.
Use Shadow Foams
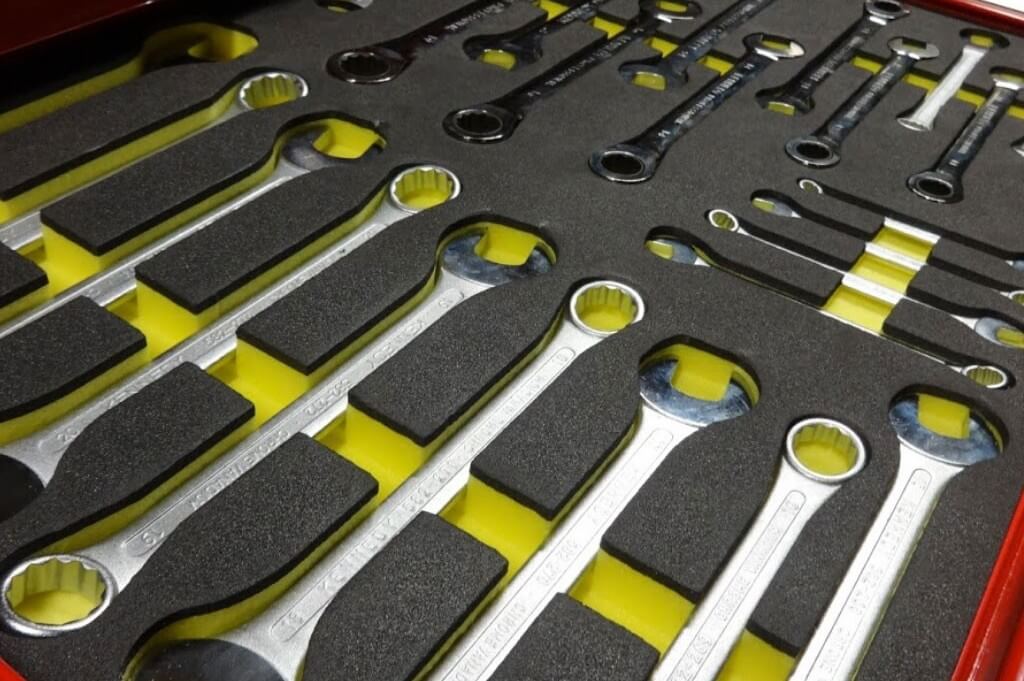
Most mechanics just lay out a thin rubber mat in their drawers to prevent them from rolling around when opening and closing them. However, if you take your tool game seriously, you need to line the drawers with high-quality cutout foams. Doing this will not only make you look highly professional but will also help preserve the tools from scratches.
Use two foams to create a shadow board
The process is quite simple; you need two layers of foam for each drawer, and it would be better if one of the layers was brightly colored. Using foam presents you with many advantages; firstly, your tools are kept well protected from damage by soft cushy goodness. Plus, the shadow board’s contrasting colors will let you know if any tool is missing from your arsenal.
I usually take a million tools out from the chest when working on a project, and after packing up, if there’s a socket-shaped red hole in one of the drawers, I know I forgot that sneaky 10mm socket somewhere in the client’s car. It’s crazy how seemingly little things can make a world of difference — if it weren’t for that contrast-red bottom foam, I’d be spending a heck of a lot more on new tools.
Keep in mind that the foam’s thickness can vary depending on the tools you store and how much clearance your tool chest provides for each drawer, but ideally, the tools should sit flush with the top of the drawer.
Cut indents in the foam using a drawn layout of your tools
By now, you should have already decided which tools are important enough to deserve a space in the coveted tool chest and made a rough mental plan as to what will go where. Now it’s time to draw the plans for each drawer onto a piece of paper roughly the same size, place it over the foam sheets, and use a foam cutter tool to start making notches — if you don’t own one, use a sharp knife and heat the blade a little; it should cut the foam just fine.
Don’t forget that even though our shadow boards consist of two layers, you should only cut the top dark-colored foam; the bottom bright foam is only used as a base.
Don’t forget to cut finger holes for easy pick up!
I know the feeling of slicing a hot blade through foam can be quite satisfying but make sure you don’t get carried away and cut more than you need to. The fit should be intimate and without any significant play to ensure the tools stay in there.
If you aren’t sure about a cut, stop for a moment and compare it with the tool. Once the tool fits nice and cozy, it is time to cut tiny finger holes so you can easily pick it up. For example, a small semi-circle on either side of the handle should be enough for most people. But of course, if you have fat fingers like me, the holes may need to be a tad bit bigger.
Use Stack-Ons Inside the Drawers for Smaller Items
Plastic stack-ons can be a great addition to your newly-organized tool chest to conveniently store smaller items like nuts, bolts, spare tire valves, and screws. These stack-ons are pretty cost-effective, and you can easily pick some up at your local Home Depot or any other hardware store. However, make sure you buy one with more compartments than you currently need, so you have reserve capacity for the future.
If you are on a tight budget, several household containers can also do fine. When I was a rookie mechanic, I discovered that two Hyundai oil filter boxes put side-by-side were the exact same width as one of the drawers. So, for years, I used old oil filter boxes to store and organize smaller items like clips, bolts, and more.
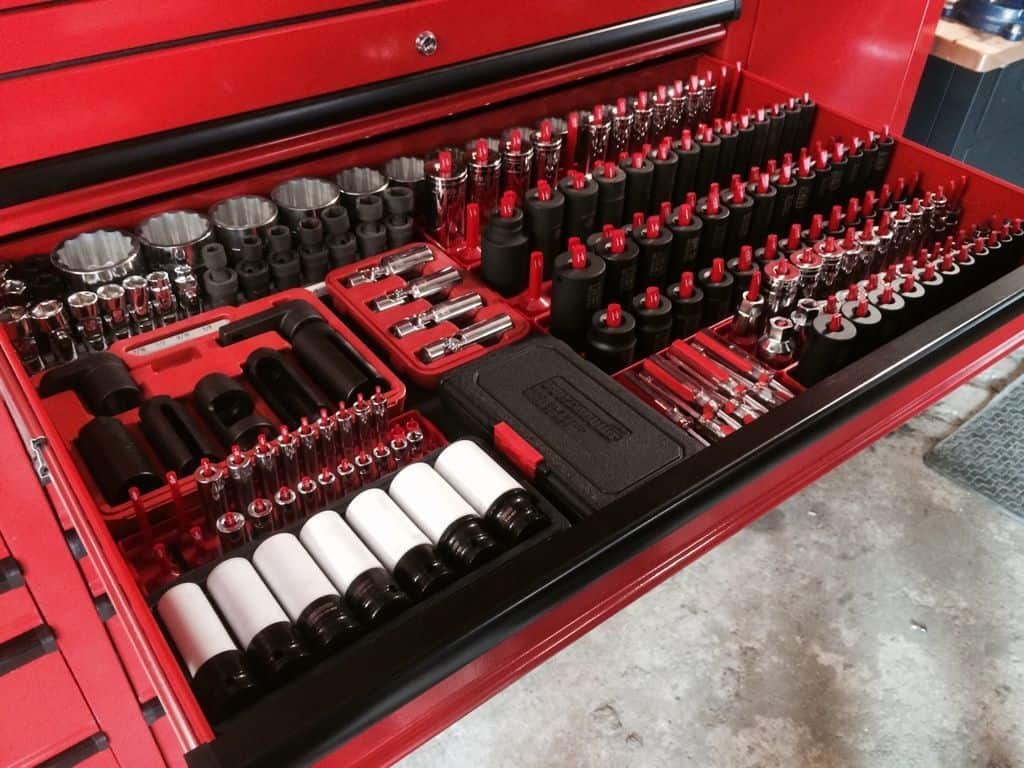
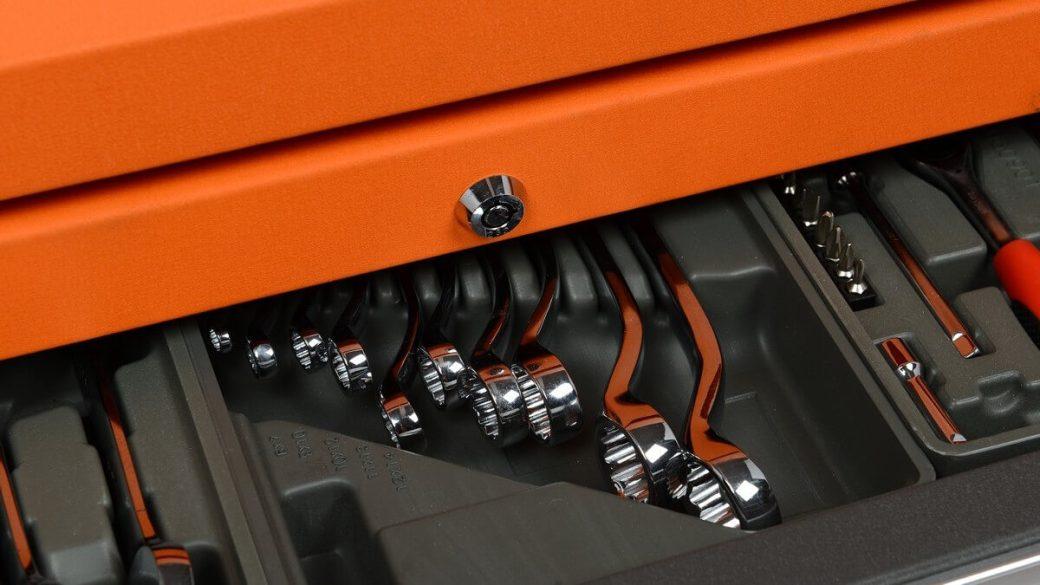
Use Socket Organizers
A socket organizer is another wildly underrated tool chest accessory for the modern mechanic — and for a good reason. Sockets are the most common tools in an auto mechanic’s arsenal. They come in all shapes, lengths, and sizes and it would take a lot of time and effort to create shadow foams for those. Plus, once they are in there, you could hardly distinguish between SAE and metric measurements without prominent labeling on the side.
Socket organizers will solve all these problems, without breaking the bank. They also come in different colors so you can use a red organizer for SAE units and a black one for metrics, so all you need is a quick glance to tell which is which. Furthermore, most models feature clear markings in bright white paint to help you find the right size quickly.
Read more: Best Socket Organizer for Amateur and Professional Mechanics
Not All Drawers Are Created Equal
Top drawers
Most other auto mechanic websites will tell you the top drawers are for storing small tools like wrenches, sockets, or screwdrivers, but that couldn’t be further from the truth. Not once have I used or seen any other mechanic use the top drawers for anything even remotely related to cars or tools.
For instance, an old colleague of mine used the first drawer as a snack stash; the guy would keep chocolate bars and tons of candies in there. Personally, I like to use the first two drawers to store my keys, cell phone, a spare knife and fork for when I forget mine, and oil change stickers.
Of course, if your tool chest has several smaller drawers, you can either have a lot of snacks (but in this case, you might be better off using a dedicated cabinet for that lol) or use them to store some smaller tools like a 1/4″ socket set, Allen keys, Torx, sandpaper, screwdriver bits, and loose bolts.
Center drawers
Middle drawers are like the honest hard working laborers on a wheat farm. They work hard under grueling conditions and handle all the abuse the job offers. Middle drawers are the most versatile ones and can store all kinds of tools and equipment.
I personally use the upper-middle drawers for wrenches, screwdrivers, and ratchet sets. The lower middle drawers are somewhat bigger and deeper, so they are suitable for slightly larger tools like Vise-Grips and Channellock pliers, torque sticks, impact sockets, pry bars, and hammers.
Bottom drawers
All that’s left now are the larger, bulkier power tools, such as impact wrenches, orbital sanders, polishers, and so on. Keeping the heavy items in the bottom drawers lowers your tool chest’s center of gravity and provides better stability when moving around. Plus, the risk of dropping these expensive tools is considerably lower when you keep them closer to the ground.
Last Words
Organizing my toolbox right is one of the best things I have done as a mechanic, and I hope this article inspired you to do the same. All it takes is a little time and effort, and you can completely transform your working experience for the better. After all, when working as an auto mechanic, finding tools is something you will do 10,000 times a day. At this rate, even saving 10 seconds each time will definitely have an impact on your “gained time.”
Of course, you don’t have to blindly follow everything I said above — there is simply no “best” way to organize a tool chest. Take what works for you, and make your own chest yours.
Oh and once again, don’t forget to leave a comment below and let us know how you organize your tools. Building the perfect tool chest is an ongoing process and I’m eager to see what you do with yours.
Who knows? Maybe I could make mine even better!


Home owner for 30 plus years. Close to being an empty nester and final getting my garage and basement back… this arrival was tremendously helpful on getting the correct mindset. I appreciate it very much… thanks for your help.. Jake