Are you the type of DIY’er who’s holding on to his old car as long as possible? Or maybe you’re restoring an old classic? If so, there is a good chance you will need to flare a brake line at some point. And to do that, you will need a flaring tool — something every serious automotive enthusiast should have in their garage.
A flaring tool is a simple device, yet absolutely essential to make new or custom hydraulic lines from scratch. Of course, you could always buy a ready-to-install replacement model but those are usually much more expensive than buying metal tubing in bulk and a bunch of fittings. Moreover, if you frequently work on vintage vehicles or modify braking systems, you might have a hard time finding something that works for you. Indeed, your local auto parts store is very unlikely to keep replacement brake lines for a ’69 Cuda in stock and if you are looking to install Nissan 300ZX brakes on your 240SX, custom brake lines are probably your best bet.
However, a quick search for flaring tools online will quickly pull out at least a hundred different models, all claiming to be the best thing out there. But dig a bit deeper, and you’ll notice not all of them are suitable for every job — some are quite inexpensive, a perfect choice for weekend DIY’ers, while professionals would greatly benefit from investing a little more and getting a flaring tool designed for speed. And to make things worse, there are several different brake flare types, and not all flaring tools are compatible with all of them. So, to help you make sense of all this and determine the right flaring tool for your specific needs and budget, we will explore everything you need to know about brake line flares, how to make them, and why you should choose a type of flaring tool over another.
If you already know the basics and just want a good flaring tool, check this post here:
Best Brake Line Flaring Tools For Experts and Beginners
What Is a Brake Line and What Is It Used For?
Despite the differences in configurations and brake systems they use, all vehicles on the road have brake lines. These are a series of steel tubing transferring brake fluid from the master cylinder towards brake calipers at each wheel, transmitting the braking power from the pedal to the brakes. Of course, since the front wheels steer from left to right, rubber hoses are employed between the rigid brake lines and the front calipers, creating a flexible connection between the two components.
Put simply, the brake lines are used to brake — as simple as that. However, the main point to remember here is that, if a line or fitting was to leak, it would effectively void the whole braking system. Once there’s a leak, it’s impossible to build pressure in the system, so no matter how hard you press on the pedal, the caliper pistons won’t even budge — which is not good, to say the least.
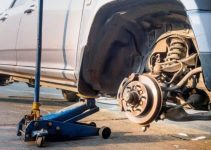
Still, brake lines are not “technically” wear-and-tear items, and in most cases, shouldn’t need to be replaced in a car’s normal lifespan. On the other hand, with time, they will inevitably rust. These metal lines run underneath the vehicle for most of their length, and as such, are exposed to all sorts of road debris, including, water, snow, salt, rocks, and so on. These unfavorable conditions may cause corrosion or mechanical damage, eventually leading to leaks in the long run.
Moreover, even if none is leaking, it’s not uncommon to have to replace a brake line because another component needs to be replaced, and well, that darn thing won’t give out without a fight. I’m not sure why but the first thing to rust on a brake line is inevitably the fitting. If you need to replace a rear brake cylinder, for example, it’s pretty frequent to see a fitting so rusty (or just damaged by the last mechanic’s Vise-Grip) that there’s no other option but to cut the brake line to remove the fitting and re-install a new one after — and for that, you’ll need to make a new flare.
Why Do Brake Lines Need to Be Flared?
Connecting a brake line to a component is not as simple as plugging connectors. Since brake fluid is under extreme pressure, a basic connection would leak every time the driver applies the brake. And even if, by some miracle, it was tightly sealed, road vibrations alone would eventually make it leak at some point.
As a result, all brake lines, and hydraulic lines in general, must fit perfectly at both ends. In low-pressure systems, the manufacturer could use a pair of flanges with a gasket in between or threaded ends with nut-like fittings. Still, none of these are suitable for connecting brake lines.
The only way to connect such high-pressure hydraulic lines is by flaring, or “deforming” the end of the line into a specific shape, a negative of the receiving end, in fact. When paired with a threaded fitting applying pressure to the bonding point as it’s tightened, a tight seal is created, good enough to hold even when flooring the brake pedal.
Common Types of Brake Line Flares
Depending on the manufacturer, several types of brake line flares are used throughout the automotive industry. No need to mention that mixing them would result in an improper connection that would inevitably leak. To prevent that from happening, here’s a brief description of the flares you might encounter when playing with brake lines.
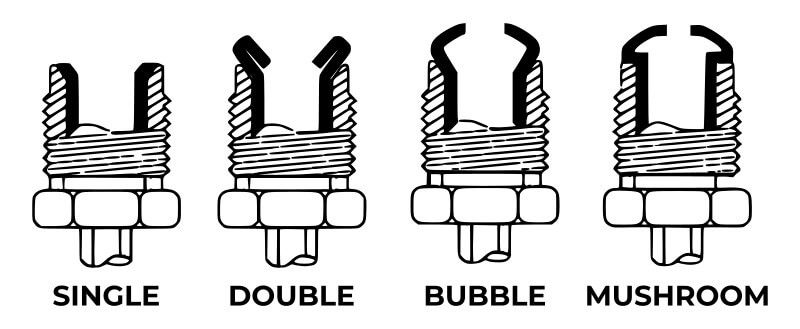
Single flares
Single flares are the simplest of them all, with ends that are deformed outwards in a cone-like shape. This type is easy to make, but its basic design is only suitable for lower-pressure systems. As a result, single flares are rarely used for automotive applications nowadays but were quite common at some point. If you work on small-engined vehicles or farm equipment, you might also come across a couple.
Double flares
Double flares look quite similar to single ones, although there is a significant difference. Here, the tubing’s end is folded inwards before getting its final cone-like shape, effectively doubling the thickness at the flared end, for a much more durable seal. As such, double flared tubes can cope with much higher pressures, making them suitable as automotive brake lines, and are widely used by American and Asian carmakers.
Bubble flares
As the name implies, bubble flares have an end that slopes outwards and then slopes back inwards, creating a bubble-like shape in the tubing. This design allows for a much better fit and consequently, a much better seal.
Moreover, the unorthodox design also ensures a leak-free connection, even if slightly misaligned during assembly. This flare type has been a standard among European cars for decades, although several manufacturers seem to have jumped on the bandwagon lately.
Mushroom flares
Mushroom flares are very similar to bubble ones, with whom they share their overall shapes. The only difference is the back surface, which is flat on a mushroom flare, whereas bubble flares have it at an angle. And just like bubble flares, mushroom flares are also most common among newer European cars.
Tools of the Trade
With so many flare types, it doesn’t come as a surprise that there are several different flaring tools too. It’s important to keep in mind that certain models come with adapters allowing you to make multiple flare types while others can only make one or two. Some are designed to be affordable, some are designed for speed, and some are designed for precision. There is simply no right or wrong here — different mechanics need different tools.
Still, since this post wasn’t intended to be a “Best Flaring Tool’ post, we won’t cover all the options available to you but rather quickly describe a couple of the most common models, their pros and cons, as well as their limitations. If you are shopping for a flaring tool, check this post here instead. And if you already have one, you can skip this section and jump directly to the next.
If you have no idea where to start, this is for you.
Capri Tools 1/4 in. Double Flaring Tool
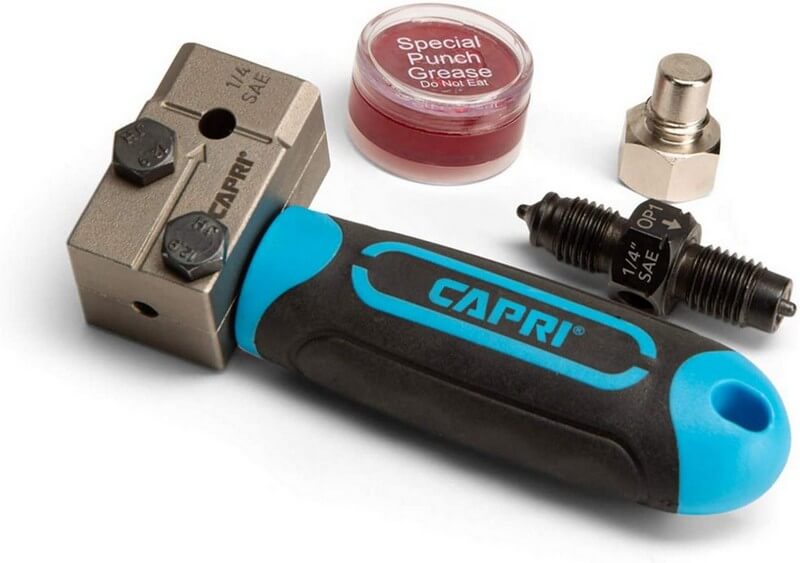
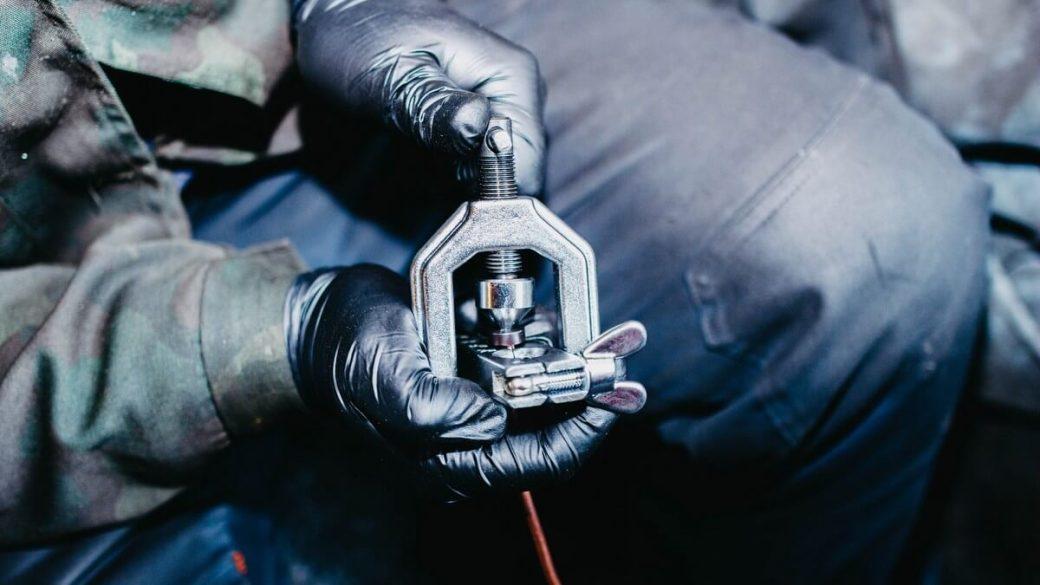
Capri’s flaring tool is a hand-held device that is compact and extremely easy to use. This tool has a single die that makes a double flare with one end and a bubble flare with the other. It’s important to mention that models such as this one can only be used on a specific tubing size. In this case, it’s designed to work on 1/4″ tubing but the manufacturer also sells models equipped with a 3/16″ die, covering the most common tubing sizes in the automotive industry.
Because of its compact dimensions, this device is unbeatable for in-situ repairs. As such, Capri flaring tool will be an excellent choice for repairing brake or hydraulic lines without having to remove them from the vehicle. It’s also quite affordable, and as such, is a pretty good option for DIY’ers only looking to work on their own cars. However, professional mechanics would need to buy one model of each size, which can make it a bit pricey.
S.U.R.&R. Pistol-Grip Flaring Tool
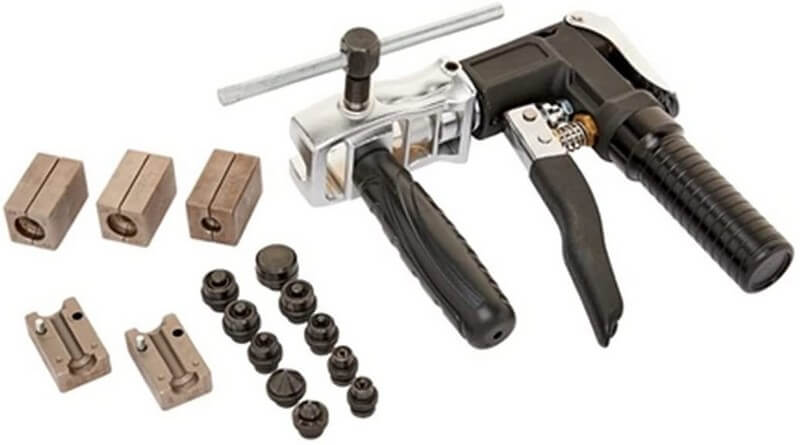
This model is another device suitable for quick brake line repairs, similar to Capri’s. But unlike the previous model, this flaring tool comes with a wide range of dies, covering almost every possible application. Still, the most significant difference between the two is the operating principle. Namely, S.U.R.&R. flaring tool is hydraulically operated, making it a lot faster to create several flares one after the other.
However, the pistol-grip handle is significantly bulkier and may not be as convenient to make flares down in an engine bay. On the other hand, it’s really hard to beat for making flares under a car, where space is not really a concern.
Mastercool Brake Flaring Tool Kit
[amazon fields=”B01NCYKQSN” value=”thumb” image_size=”large” image_alt=”Mastercool Brake Flaring Tool Kit”]
Mastercool’s Brake Flaring Tool Kit is the perfect go-to choice for professional automotive mechanics. Notably, this model comes with all sorts of dies and can also make those push-to-connect fuel connectors.
The hydraulic ram applies the pressure steadily and evenly, allowing it to create perfectly-shaped flares every time and the longitudinal handle also makes it a bit easier to slide in tight spaces. It’s obviously a bit more expensive than most, but if you are serious about your flares and want to be ready for whatever your clients throw at you, this is what you need.
How to Flare Brake Lines — Step-by-Step Guide
For the most part, all brake line types are flared roughly the same way, with only small differences depending on the shape. Still, in all cases, if you are making the brake line from the ground up, measuring is the most important step. Make sure to consider things like bending radiuses and general geometry, and never forget that metal tubing isn’t that flexible so the tubing needs to be correctly measured or the fittings just won’t reach.
“Measure twice, cut once.”
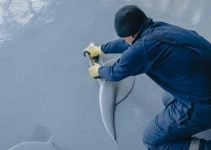
When cutting the tubing to the desired length, make sure to do so at a perfect 90-degree angle. Having an appropriate tubing cutter would definitely help here. Once done, make sure to thoroughly deburr the tubing’s end, and remove any metal shavings that may cause the tubing to flare unevenly.
Next, slide in the fitting over the tubing before you flare the line; it will be impossible to install the fitting later. And yes, this step might seem self-explanatory but trust me, you’ll forget (at least I forget all the time) — and that will only happen after you’ve made the most beautiful flare of your life, only to have no other choice but to cut it, slide the fitting in, and re-do it all over again.
So yeah, check that twice.
How to make single flares
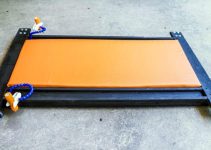
- If you are using a manual flaring tool, start by positioning the tubing in the right hole size in the flaring bar and tighten the wing nuts to securely grip the tubing. If you are using an hydraulic flaring tool, this step is not necessary.
- Position the yoke over the tubing and make sure it’s dead-center. If it’s offset, the tubing will flare unevenly and you’ll have to start over.
- Apply a bit of oil to the tip of the cone to reduce the risk of cracks.
- Start turning the handle (or pumping a couple of times if you are using a hydraulic model). How hard you’ll need to go is noto explain; this is really a question of feeling and you’ll only learn the right way to do it with experience and after failing a couple times. If you are lucky, the flaring tool you are using will come with an instruction manual giving you a rough estimate of the number of turns (or pumps) it will take to reach a satisfactory flare but it’s very unlikely. I would highly suggest trying on a scrap piece of tubing first.
- Remove the yoke and inspect your flare. Make sure it’s centered and that it sits right in the fitting.
- If it’s all good, your job is done!
How to make double flares
- In this case, you’ll use an anvil attachment to create a double flare. Start by positioning the tubing in the bar (or hydraulic tool) and use the anvil’s shoulder to measure by how much the tubing should protrude.
- Place the anvil on the tubing, pin down/seat up, and just like with the single flare, put the yoke over the anvil and align the cone. Turn the handle (or pump) anvil sits flush with the bar.
- Finally, remove the anvil and re-position the cone over the tubing and repeat the process to make a single flare
- Again, inspect the flare for cracks and splits and voila!
How to make bubble flares
Making a bubble flare is quite similar to a double flare but with a different attachment and without repeating the process like a single flare. Still, you’ll need to ensure the attachment is properly centered and flat. Then, use the yoke to squeeze the tubing with the attachment until a “bubble” forms at the end. Make sure you don’t overdo it — I’ve done it more than I remember and ended up with a cracked flare.
How to make mushroom flares
Making mushroom flares is similar to bubble flares but with a different attachment — the rest is exactly the same.
Last Words
There’s no denying it; knowing how to flare brake lines is a must-have skill for any DIY’er and professional mechanic. Despite not being something you will use every day, it will more than prove its value the next time you need it.
Still, making good flares every time is more art than science and comes with quite a learning curve. I’ve been making flares for over 15 years, and I still manage to scrap one every once in a while — not to mention that all is well when making a brand new brake line from scratch, with plenty of room to work, but it’s a whole another story when trying to make one deep down in an engine bay because the fitting at the other end won’t budge and risk breaking everything if removed.
Nonetheless, like any other skill, brake flaring can be learned no matter who you are, assuming you’ve got a great tool to rely on and a lot of practice. If you plan on making flares on your project car, the wife’s SUV, or your mom’s minivan, make sure to practice a little on scrap pieces of tubing beforehand. As mentioned earlier, brake leaks are quite dangerous and bad flares will inevitably leak at some point — and you don’t want that happening when driving on the highway… or anywhere for that matter.
Happy wrenching!