Scratching your head won’t solve anything.
Watching your new shiny car or an old but recently re-painted one is like the first days of a honeymoon. Everything is nice and easy at first, and you feel like you are in the seventh heaven and all that. But quickly enough, the magic of new beginnings starts to wear out. The same thing happens when you first notice the first scratches on your new car paint. Luckily, that gutted feeling can be easily fixed, don’t you worry.
Of course, you can get a professional to bring back that original shine—but that costs a lot of money. A better option is to actually learn how to do it yourself so you can save your hard-earned bucks and maintain it regularly, so you never have to look at those dreaded scratches ever again. And of course, given that you found this post, we can safely assume that you are already quite handy around cars and DIY repairs, right?
If you are willing to put a little elbow grease in, there is no doubt you can learn how to remove scratches from a car in no time. It sure takes a little practice, but it’s actually pretty easy once you get the hang of it.
How to Remove Light Car Scratches
First, to choose the right procedure, you’ll have to determine the depth of your problem—literally. Scratches, and the right approach to removing them, differ according to how deep they penetrate the paint surface. To categorize a scratch as a “light scratch,” you can use the easy fingernail test. Just run your fingernail over the scratch, and if it doesn’t catch on it, you’re good.
Light scratches are the easiest ones to remove (obviously). And luckily, there are already many products designed for removing these kinds of scratches, usually called something like Scratch & Swirl Remover, Scratch Eraser Kit or Scratch Doctor.
In some cases, you can even add toothpaste to the lot as they are all basically low abrasive compounds. However, I tend to prefer using products designed specifically for the job, but if you are running on a tight budget, you might want to try toothpaste first—you never know.
What you’ll need:
- Scratch removal kit or;
- A couple of clean microfiber towels
- Rubbing compound
- Polishing compound
Step 1. Preparation
Preparation is essential here as you’ll have to clean up the surface. You don’t want to make it worse than it already was by scratching it even more with dust and dirt.
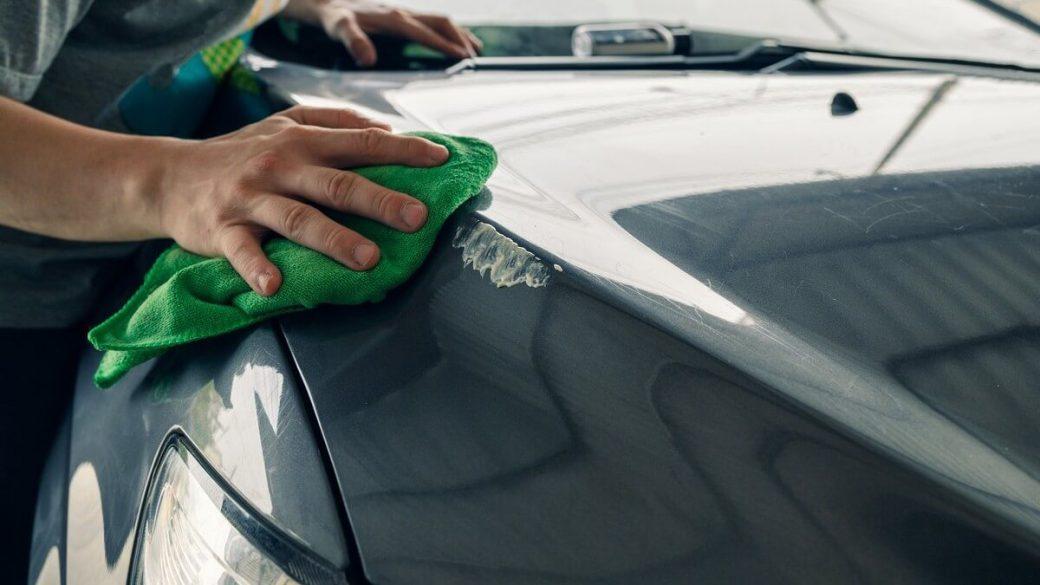
Wash the surface with car-safe soap and water, then rinse and dry.
Step 2. Rubbing Compound
Then take a clean microfiber towel and apply the rubbing compound on the scratch. Rub using a circular motion for about a minute. Be precise. You don’t need to go beyond the scratched surface. Don’t get carried away here.
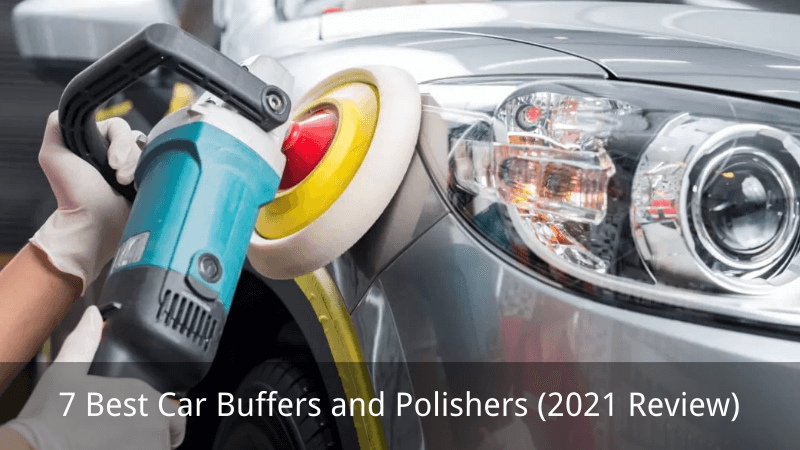
This could also be done using a pad and a drill or a car buffer/polisher set at medium speed. However, excessive speed could eventually burn the paint if done incorrectly. If you aren’t sure, you are better doing it by hand.
Step 3. Polishing Compound
Wipe the excess rubbing compound and run the treated surface once more with a polishing compound to get back that original shine. This step is basically the same as the previous one but using a different compound. It could also be done using a drill/buffer/polisher.
Step 4. Repeat
Wipe the polishing compound and inspect the scratch. If it’s still visible, repeat the same process once more. If it’s still there after that, your scratch should have potentially been categorized as a “small” scratch instead.
How to Remove Small Car Scratches
The same fingernail test can identify minor car scratches. This time we are looking for scratches that can stop your fingernail while running over the surface. They can be caused by little things, some that you won’t even notice sometimes.
Hitting branches in the wild, leaving your lunch box on your trunk and rubbing it around, removing snow from your car in winter, etc., can all scratch your fragile car paint. The main difference between a “light” scratch and a “small” one is that light scratches only damaged the clear coat, while small scratches go even beyond and sometimes get to the base coat.
What you’ll need:
- A couple of clean microfiber towels
- A buffing pad
- Rubbing compound
- Polishing compound
- 3000-grit wet sandpaper (optional)
Step 1. Preparation
Once again, you have to thoroughly wash the car first, specifically on the scratched area, and let it dry before you can continue.
Step 2. Rubbing Compound
Apply rubbing compound to the buffing pad and apply it to the scratch. You can forget about Mr. Myagi’s technic here as we need firm and precise rubbing pressure back and forth. Keep at it for a couple of minutes. You should see the scratch start to disappear.
Step 3. Wipe
The next step is wiping out the area with a clean microfiber towel and checking the results from the previous step.
Step 4. Repeat
Repeat step 2 four to five times so that you don’t damage the paint by rubbing too aggressively but also to make sure that the scratch is gone.
Step 5. Polishing
Repeat step 3 and apply the polishing compound. Polish the surface until the shine matches the rest of your car paint.
How to Remove Deep Car Scratches
If all of the previous steps didn’t cut it, the scratches might have been deeper than initially thought. Deep scratches require more work and a more dedicated approach. Here you have two choices: get your hands dirty and save a bunch of greens, or take your car to a professional.
These types of scratches are usually easily noticeable from a distance and can originate from small rocks, light contact with your kids’ bike, or with a bit of help from your jealous neighbors key. However, do not despair, as there is a solution for everything.
What you’ll need:
- A couple of clean microfiber towels
- 320-grit sandpaper
- 500-grit sandpaper
- 2000-grit wet sandpaper
- Masking paper
- Masking tape
- Automotive primer spray
- Automotive paint spray
- Clearcoat spray
- Spray paint gun (optional)
Step 1. Preparation
Again clean the surface and let it dry before you start with the more serious work.
Step 2. Sanding
Start sanding the scratched area using a sanding block and 320-grit sandpaper. Don’t go crazy here, as such coarse sandpaper will dig in the paint quite quickly. Stop once the scratch disappears.
Work on the smallest area possible as you don’t want to open a Pandora’s Box and end up having to repaint the whole car.
Step 3. Rinse
Rinse away all the debris and wash the area. Wipe the area with a clean microfiber towel (or, even better, a tack cloth) so there is no dust or dirt left on the surface.
Step 4. Masking
Mask the surrounding area and adjacent panels with masking paper and tape the edges to avoid unwanted paint fumes sticking to other parts of the car.
Step 5. Applying Primer
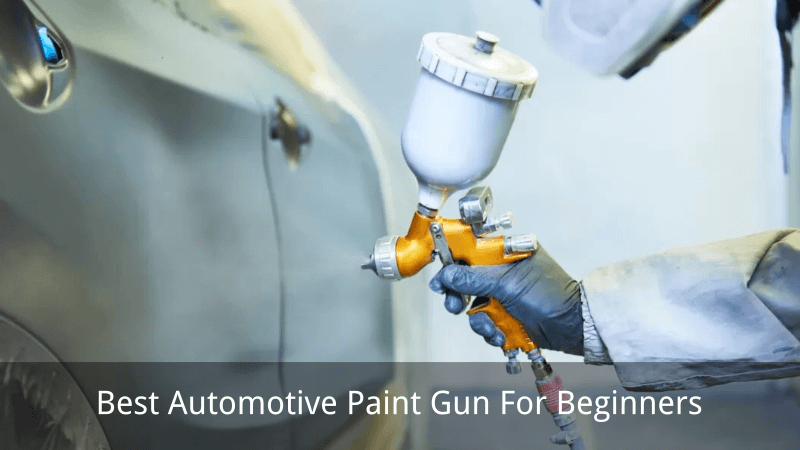
Here you could go two ways. If you already have an air compressor at home, get your hands on a good spray paint gun. Using a spray paint gun will not only make it faster but will also often deliver a better finish. However, spray guns are harder to control and come witĥ a learning curve. It’s, in fact, a lot easier to make the paint drip if you are not so sure how to set and operate a spray paint gun properly.
When in doubt, you can also simply use spray paint cans. They are a lot easier to control and require no adjustment whatsoever. On the other hand, they are simply not suitable for larger surfaces and will make it a lot more challenging to match the paint to the nearby surfaces.
Once you’ve decided which way to go, the process is very similar. Spray the area with a few coats of primer (2 is usually enough unless you have sanded until reaching bare metal) and let it dry for about 15 minutes between each layer.
Step 6. Sanding the Primer
Once completely dry, sand the primer until it’s smooth using 320-grit sandpaper. Finalize the process with 500-grit sandpaper.
Step 7. Selecting the Right Paint
The next step is to paint the area with a matching color. To make sure you order the exact same paint as what was originally on your car, look for the sticker inside the driver’s door jamb. The code is usually there, but given that there are always tons of various info on that sticker, you might need to look where it is in your car’s repair manual first.
When it comes to selecting paint, never eyeball it. After all, we all learned that there was, at least 50 shades of grey, so never improvise here.
When in doubt, call your paint manufacturer, and they will be able to help you with that—these guys usually know their thing alright!
Step 8. Base Coat
If you use a spray gun, you’ll first need to mix the base coat and reducer in appropriate proportions. To make sure you get it right, closely follow the manufacturer’s recommendation. An incorrect mix will do more harm than good. If you are using a spray can, no need to bother as it’s already mixed.
Start spraying paint from bottom to top, overlapping each pass by 50% to 75%. Once the first coat is done, make sure the primer is almost entirely covered, and the color is uniform. Let dry and repeat the process once more. If needed, spray a third coat.
Step 9. Clear Coat
When spraying a clear coat, the process is basically the same as with the base coat, unless that the clear coat needs to be mixed with an activator. If you are using spray cans, make sure to check since some paint-in-a-can already include clear coat, so you might be able to skip this step.
Start by spraying a medium-wet coat (you’ll see that clear coat drips a lot faster than a base coat). Repeat the process, but this time, spray a “wet” coat—this is what will make the clear coat look “clear.”
Let dry.
Step 10. Polishing
Once the clear coat is entirely dry, polish the surface to make the newly painted surface blend with the old.
Voila!
Last Words
You can always turn your head the other way (followed by a colorful swearing) after you spot some scratches on your car, or you can get matters into your hands and do something about it. No matter how deep a scratch is, there is always a way to fix it without spending big bucks at the body repair shop.
All you need is to follow some simple steps, spend some time you would otherwise use to surf the internet, some practice, and a couple of dollars. After that, we are confident that you’ll look at your car with the same passion as the day you’ve bought it.